Here is what I did this past week on my "Ross day".
I made "Fix It" grammar notebooks for my three older children. Fix It is another wonderful product made by IEW, the same company that produces our writing curriculum. In it there are 5 different classic stories (for different ages) that have grammar errors imbedded in them. Each day the children try to find the errors in ONE sentence. Yes, just one sentence! As they edit and correct, we discuss the appropriate grammar rules and then they rewrite the sentence correctly. By the end of the school year, they will have edited and rewritten the entire story! I love that it is broken down into very small chunks each day, and I love that the grammar rules will be very relevant because they are tied to writing. A few years ago my daughter used Editor in Chief, which is another error finding and fixing workbook, but neither of us were happy with it for several reasons. Of course we haven't actually used Fix It yet, but it looks far superior to EiC, and I'm excited to give it a try!

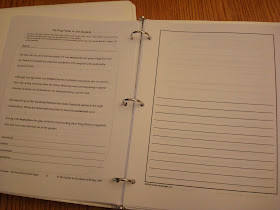
I purchased the teacher book, and then downloaded the student pages from the IEW website. I printed out these student pages, they are pictured below on the left. Each page represents a week's worth of work, 1 sentence to correct for each of 4 days. I found some blank lined pages here and printed them on the facing page, so my children can easily re-write the corrected sentences each week. This will also be cursive writing practice for all three of them (bonus!! penmanship practice taken care of too!).
 I printed out a few pages that have space at the top for drawing pictures to go along with the story, since all our children love to draw!
By the way, I just want to put in a plug for my friend Debra and her fantastic website, notebooking pages.com. She has several sets of notebooking pages for sale, for all different subjects, and she also has a FREE section where I found the pages for our Fix It notebooks. She also has lots of samples and encouraging articles on how to use notebooking in your homeschool. Click on the button in my right sidebar to visit her website.

I was also able to prepare two more posters for our poster center. Centers are not a new idea to me, but I had never explored ways to make them work for us until last summer when I read about the Workbox System. We don't have tons of room and I just didn't think I could be creative enough to make centers work in our limited space and with our limited budget. However, Sue Patrick explains in her book how centers can be such a great way to reinforce learning in a fun way ~ so much so that children don't even realize they are still learning! They can also break up the day, giving a nice change of pace from bookwork.
I realized that since posters are flat and don't take up much space, that was a "center" I could do pretty easily. We used our poster center this past year and the children loved it! Over the years I had already acquired several posters, so as I was able I bought second posters identical to the first. Sue's point about a poster center, is that it needs to be interactive to be effective. So I followed her guidelines and cut out all the pieces of the second, matching poster.

Then I put velcro on the original poster and on the backs of all the matching pieces. Voila! Last fall I taught the children how to use the poster center. When they stick the matching piece onto the poster, they must either name the piece or say the word on the piece. This way they are seeing the item, saying the name of the item, and hearing themselves say the name of the item, all at the same time. Multi-sensory!
I have been blessed to find posters covering specific topics that I wanted to practice with the children. Here is one of our new ones for this fall:

Here is our poster center collection so far. We will use just 2 or 3 at a time in our poster center (which is the back of a toy bin shelf, which sticks out into the room creating a little "wall").

Each week I plan to post what I get done on my "Ross day", so stay tuned!
Love reading about your school year to come! I get so many great ideas from you!
ReplyDelete