In this post I told how we are doing a "math hour" and an "English hour" every morning. I am loving this because it encourages the kids to "work ahead" (almost never does a day's scheduled math work take the full hour, except for the oldest two) and do subject-related games or activities for the rest of the allotted hour. This means seldom used games are now being used! Little Man and I play a math related game almost every day. It's fun!
This year, thank the Lord!, I have been able to keep up with teaching writing to the younger two boys together three days a week. At least so far! I am spending roughly a month on each of the Teaching Writing: Structure and Style units. In September we worked through units 1 and 2 (they go together) and are currently working through unit 3, which is story writing. This week we made an outline together of the story, The Lion and the Shepherd, and each of the boys copied the outline onto notebook paper. From this outline they later re-wrote the story in their own words. Next week we will add "dress ups" and type the finished stories.
Our four high schoolers get most of their daily writing homework from their English class at our co-op (which I teach!). We have been studying poetry, and have a test coming up next week. Here daughter G is making flashcards of all the poetic device definitions that will be on the test (surrounded by piles of clean folded laundry!).
We spent four weeks learning about Ancient Egypt, the land Moses grew up in. This week we went back to the beginning and read about creation through Noah's flood from the book of Genesis, which Moses is believed to have authored. We are only half done with this creation poster, but each of us gets to illustrate one square.
And at the end of the day, story time with dad. He is currently reading the first Harry Potter book out loud to the whole family. He does all the different voices and is a delight to listen to. Truly! (again, surrounded by piles of clean folded laundry! While you listen, you fold...)
There were hard moments during this week, even hard whole days, but I am choosing to be grateful for all that was accomplished in our minds and souls in spite of the hard times. God is faithful!
Showing posts with label TOG year 1 unit 1. Show all posts
Sunday, October 19, 2014
Saturday, October 18, 2014
Egyptian Paddle Dolls
Our senior asked me during the summer if I could please make history "fun" for her final year of high school. I told her I would try! The ancient world is her favorite period of history to study so she is thrilled to end her high school career learning about that time period, and she is so artsy/craftsy that I decided one of the ways we would make history fun was to do hands on projects a couple/few times a month. Our first such project was making Egyptian paddle dolls.
Egyptian girls played with flat dolls made from wood. We made ours from cardboard. The girls made girl dolls, and the boys made boy ones. :)
We had beads and yarn available for hair, if desired. We talked about how Egyptians created art ~ they painted heads in profile, because that was considered the most attractive view, bodies head on (again, most attractive view), and feet in profile. It made for a very interesting and distinctive perspective!
Here are the finished dolls, from left to right....daughter G's, son G's, daughter H's, son L's, son C's, and Little Man's. A fun afternoon of painting!
We had beads and yarn available for hair, if desired. We talked about how Egyptians created art ~ they painted heads in profile, because that was considered the most attractive view, bodies head on (again, most attractive view), and feet in profile. It made for a very interesting and distinctive perspective!
Monday, October 13, 2014
First Day of School ~ 2014
Our traditional breakfast out on the first day of school! Clockwise from left to right: first day of 10th grade, first day of 7th grade, first day of 9th grade, first day of 12th grade, first day of 10th grade, and first day of 4th grade.
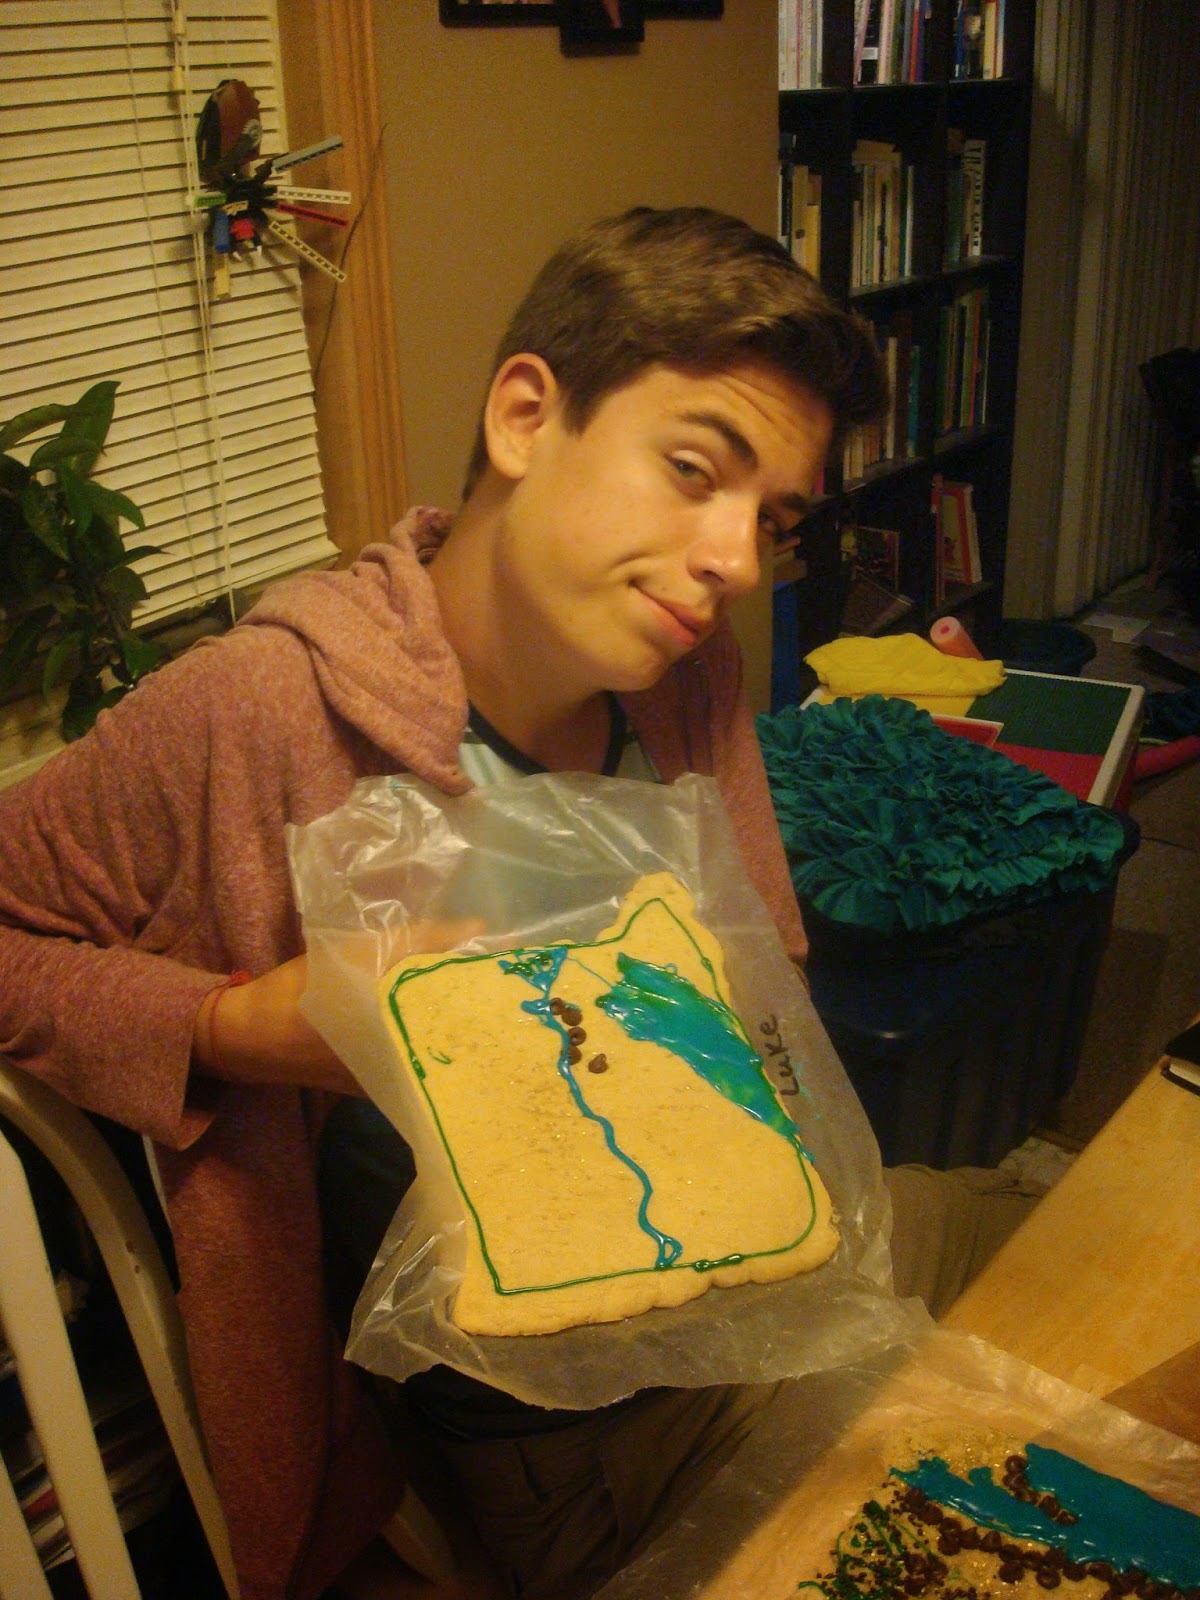
We came home from breakfast out and made our traditional cookie dough maps. Because we are studying Year 1 of Tapestry of Grace this year (the Ancient World), we once again made maps in the shape of Egypt. We used chocolate chips for the mountains and blue frosting for the Nile River, Mediterranean, and Red Sea. Daughter G also used gold sprinkles for the desert. Click here for detailed instructions on how to make cookie dough maps.
Son C's finished map.
Little man's.
Daughter H's.
Son L's.
Daughter G's.
Son G's.
Hubby and I spent considerable time this summer evaluating last school year and praying about what we could do to put a framework in place that would be more conducive to success. Attitudes of others we cannot control. Routines and methods we can! We made the "radical" decision to require all our children to work in the schoolroom during the morning, and to do their work in a specific order. We expected some balking from our high schoolers since they were used to working in their bedrooms, but nearly everyone was surprisingly amenable to this idea!
Three of our children begin their day with math hour, and the other three with English hour. I literally set a timer for an hour, and when it beeps the math students switch to English and the English students switch to math. This degree of structure is something we've borrowed from brick and mortar schools, and it is working very well! If math or English work is not completed during this time, it becomes "homework" for later in the afternoon/evening. This is followed by science hour, and then it's lunchtime. After lunch we have book time and history all together, and then the children are free to finish their work anywhere in the house where they feel they can get it done.
Little man has both his regular desk (behind him in this pic), and the old fashioned wooden school desk, where he likes to watch his math lessons on dvd. We call this area under the stairs his cave! He loves to spend time in it, and he's pretty much the only person who can comfortably fit there. :)
This is the view from my desk. Little man and daughter H's desk is slightly behind me and to the right of this pic.
I am thankful for a dedicated place to work. I'm thankful for children to teach, and for the privilege of learning together with them at home. I'm thankful for the full support, encouragement, and wisdom of my husband. I'm thankful this school year got off to a much better start than last year!
We came home from breakfast out and made our traditional cookie dough maps. Because we are studying Year 1 of Tapestry of Grace this year (the Ancient World), we once again made maps in the shape of Egypt. We used chocolate chips for the mountains and blue frosting for the Nile River, Mediterranean, and Red Sea. Daughter G also used gold sprinkles for the desert. Click here for detailed instructions on how to make cookie dough maps.
Son C's finished map.
Little man's.
Daughter H's.
Son L's.
Daughter G's.
Son G's.
Hubby and I spent considerable time this summer evaluating last school year and praying about what we could do to put a framework in place that would be more conducive to success. Attitudes of others we cannot control. Routines and methods we can! We made the "radical" decision to require all our children to work in the schoolroom during the morning, and to do their work in a specific order. We expected some balking from our high schoolers since they were used to working in their bedrooms, but nearly everyone was surprisingly amenable to this idea!
Three of our children begin their day with math hour, and the other three with English hour. I literally set a timer for an hour, and when it beeps the math students switch to English and the English students switch to math. This degree of structure is something we've borrowed from brick and mortar schools, and it is working very well! If math or English work is not completed during this time, it becomes "homework" for later in the afternoon/evening. This is followed by science hour, and then it's lunchtime. After lunch we have book time and history all together, and then the children are free to finish their work anywhere in the house where they feel they can get it done.
Little man has both his regular desk (behind him in this pic), and the old fashioned wooden school desk, where he likes to watch his math lessons on dvd. We call this area under the stairs his cave! He loves to spend time in it, and he's pretty much the only person who can comfortably fit there. :)
This is the view from my desk. Little man and daughter H's desk is slightly behind me and to the right of this pic.
I am thankful for a dedicated place to work. I'm thankful for children to teach, and for the privilege of learning together with them at home. I'm thankful for the full support, encouragement, and wisdom of my husband. I'm thankful this school year got off to a much better start than last year!
Thursday, June 9, 2011
Jeopardy - Ancient History Edition!
When we ended our school year last week we decided to have a family Jeopardy competition instead of a unit celebration. June has shaped up to be a very busy month, and it was just easier to do a simple thing to mark the end of our year. And sometimes it's nice to have a change of pace!
I made up questions in four categories, based on our studies for the entire year. They ranged in point value from 100 (timeline 100 question: what does B.C. stand for?) to 500 (what year did the western Roman Empire fall?). No notes were allowed. (note: I am going to laminate this Jeopardy poster so it will be easy to use over and over again, but I am going to change the last category to "Daily Life" instead of "Countries".)

Daddy and the two younger boys made up one team.

And the three older children made up the other team. Team members could confer with each other before the final answer was given. To make it easier I did not have them answer with the question, as in the original TV Jeopardy.

Some of the conferring happened up in the air!

The older children's team won by a narrow margin. It was a fierce competition! Afterward we had cookies and ice cream.


A simple but fun ending to our year!
I made up questions in four categories, based on our studies for the entire year. They ranged in point value from 100 (timeline 100 question: what does B.C. stand for?) to 500 (what year did the western Roman Empire fall?). No notes were allowed. (note: I am going to laminate this Jeopardy poster so it will be easy to use over and over again, but I am going to change the last category to "Daily Life" instead of "Countries".)
Daddy and the two younger boys made up one team.
And the three older children made up the other team. Team members could confer with each other before the final answer was given. To make it easier I did not have them answer with the question, as in the original TV Jeopardy.
Some of the conferring happened up in the air!
The older children's team won by a narrow margin. It was a fierce competition! Afterward we had cookies and ice cream.
A simple but fun ending to our year!
Friday, October 29, 2010
Year 1 Unit 1 - How I made 4 costumes in one day, for less than $20
If you consider yourself a seamstress you will want to stop reading right now. :-)
I only had one day to sew costumes for our unit celebration last weekend, and I had 4 to make (Little Man used a Biblical costume from when his sister was his age and needed it for a church program, so his was done. Yay!). So nothing I made is going to win any contests. Still, they look pretty good in the pictures, don't they? Proof positive that you don't need to spend much time or have much expertise to do simple costumes!

About 4 years ago when we were getting ready for our very first unit celebration (a medieval feast) I went to the Salvation Army thrift store and bought several solid colored top sheets for about $3-$4 each. Those sheets served us well as medieval "tunics" (no sewing at all, just slits for our heads cut in the middle of a fold) and now was the time to turn them into something else. Every single costume except Little Man's used to be a sheet! The only exception to that was the colorful swirly blue fabric I purchased to make the High Priest's ephod.
The Egyptian costumes were the easiest. Daughter G's was a large piece of white sheet folded in half, with a slit cut for her head and then sewed up the sides. Son L's was just a long strip of sheet material wrapped around his waist and pinned. Ta-da!

For the other two Biblical costumes I modified a bathrobe pattern that I already had. We needed two layers for Moses' costume (robe and sleeveless tunic on top) and for the High Priest's costume, three layers. So a total of 5 tunics, some with sleeves and some without. To save time I cut the tunics out two at a time. Below you see the white fabric for the High Priest's robe and the beige fabric that became Moses's sleeveless tunic.

If one layer needed to be shorter than the other, I just folded back the pattern, cut across the short one, and then put the pattern back to cut the longer one.

I never changed thread color. Everyone got red because that's the robe I sewed first! I finished very few edges.

And that's how I made 4 costumes in one day.
While I did the sewing, daughter G worked on the accessories. She is the queen of costume accessories and I couldn't have done this in one day without her! Here she is making the beard that Moses and Abraham shared. It is just cotton balls glued onto a form that she made from a sheet of printing paper. She curved it slightly so it would fit around a face, and measured on a real face frequently while working.

She sewed a loop on each top corner out of embroidery floss to fit over the ears.

Here is Moses wearing it!

The High Priest's costume took the longest simply because it was 3 layers, and because I took the time to hand sew small bells on the bottom of his blue tunic. This took longer than any of the machine sewing, but really added authenticity, and I did it while my husband and I watched a movie so it wasn't too boring.


Son G made his breastplate out of yellow posterboard and colored buttons. He used a page in The Rose Guide to the Tabernacle to help him know which color of button to use for each gem, and how to place them in the proper order.

He also made his shofar out of yellow posterboard and a balloon. We followed the directions in the book Old Testament Days, but I have to say, it didn't work that well for us. We ended up taking the balloon out and using the mouthpiece from my husband's trumpet instead. That worked great!


I made the High Priest's turban out of yellow posterboard and a plastic Target shopping bag! We cut a strip of posterboard long enough to go around his head, folded it in half lengthwise, and then inserted the bag into the fold and stapled it shut.


The front.

And the lovely target symbols on the back! :-)

Here they are! Two Egyptians, Moses, Abraham, and Aaron the High Priest.

2 yards of fabric for the High Priest's ephod: $11.50
package of bells: $3.99
time spent cutting and sewing: about 9 hours
memories made: PRICELESS!
I only had one day to sew costumes for our unit celebration last weekend, and I had 4 to make (Little Man used a Biblical costume from when his sister was his age and needed it for a church program, so his was done. Yay!). So nothing I made is going to win any contests. Still, they look pretty good in the pictures, don't they? Proof positive that you don't need to spend much time or have much expertise to do simple costumes!
About 4 years ago when we were getting ready for our very first unit celebration (a medieval feast) I went to the Salvation Army thrift store and bought several solid colored top sheets for about $3-$4 each. Those sheets served us well as medieval "tunics" (no sewing at all, just slits for our heads cut in the middle of a fold) and now was the time to turn them into something else. Every single costume except Little Man's used to be a sheet! The only exception to that was the colorful swirly blue fabric I purchased to make the High Priest's ephod.
The Egyptian costumes were the easiest. Daughter G's was a large piece of white sheet folded in half, with a slit cut for her head and then sewed up the sides. Son L's was just a long strip of sheet material wrapped around his waist and pinned. Ta-da!
For the other two Biblical costumes I modified a bathrobe pattern that I already had. We needed two layers for Moses' costume (robe and sleeveless tunic on top) and for the High Priest's costume, three layers. So a total of 5 tunics, some with sleeves and some without. To save time I cut the tunics out two at a time. Below you see the white fabric for the High Priest's robe and the beige fabric that became Moses's sleeveless tunic.
If one layer needed to be shorter than the other, I just folded back the pattern, cut across the short one, and then put the pattern back to cut the longer one.
I never changed thread color. Everyone got red because that's the robe I sewed first! I finished very few edges.
And that's how I made 4 costumes in one day.
While I did the sewing, daughter G worked on the accessories. She is the queen of costume accessories and I couldn't have done this in one day without her! Here she is making the beard that Moses and Abraham shared. It is just cotton balls glued onto a form that she made from a sheet of printing paper. She curved it slightly so it would fit around a face, and measured on a real face frequently while working.
She sewed a loop on each top corner out of embroidery floss to fit over the ears.
Here is Moses wearing it!
The High Priest's costume took the longest simply because it was 3 layers, and because I took the time to hand sew small bells on the bottom of his blue tunic. This took longer than any of the machine sewing, but really added authenticity, and I did it while my husband and I watched a movie so it wasn't too boring.
Son G made his breastplate out of yellow posterboard and colored buttons. He used a page in The Rose Guide to the Tabernacle to help him know which color of button to use for each gem, and how to place them in the proper order.
He also made his shofar out of yellow posterboard and a balloon. We followed the directions in the book Old Testament Days, but I have to say, it didn't work that well for us. We ended up taking the balloon out and using the mouthpiece from my husband's trumpet instead. That worked great!
I made the High Priest's turban out of yellow posterboard and a plastic Target shopping bag! We cut a strip of posterboard long enough to go around his head, folded it in half lengthwise, and then inserted the bag into the fold and stapled it shut.
The front.
And the lovely target symbols on the back! :-)
Here they are! Two Egyptians, Moses, Abraham, and Aaron the High Priest.
2 yards of fabric for the High Priest's ephod: $11.50
package of bells: $3.99
time spent cutting and sewing: about 9 hours
memories made: PRICELESS!
Tuesday, October 26, 2010
How we Made our Model of the Tabernacle
Please read my Disclaimer post before reading this one. :-)
To make our Tabernacle model we first went to the craft store and found a bunch of stuff we weren't really shopping for! (and that stayed at the store)
hahaha

But we also found things we needed. We talked about the project and planned it out before going to the store. Since we intended to send it later to my parents, our model had to be easy to take down and put up again. We looked at pictures of other models online to give us ideas, and decided to use a foam base as in my friend Laurie's model. We also assigned one of the holy articles to each child to make out of sculpey clay, so one of the children was tasked with the job of finding the sculpey clay in the store, and another couple of them picked out the paint colors we'd need (small bottles of acrylic paint for painting the holy things).
Here G and G are picking out the felt coverings for the Most Holy Place. We got four different colors to correspond to the four different coverings ~ white for "linen of the finest quality", gray for "goat's hair", red for "ram's skin dyed red", and brown with a swirly pattern for "the hide of sea cows".


This entire project took us about a week, but most of the work was done during just two of those days. The children completely owned this project. I did very little, and in fact, could have probably done nothing!
We found a 12" by 20" piece of foam for the "ground" and spray painted it brown. I'm not sure I'd spray paint foam again, as the paint seemed to melt the foam in a few places, but we figured that made the ground look more realistic. We also spray painted some craft sticks gold, to simulate the acacia tent poles that were overlaid in gold. Spray paint worked fine on those. Once the foam and sticks were dry, we began poking the sticks into the foam, evenly spaced.

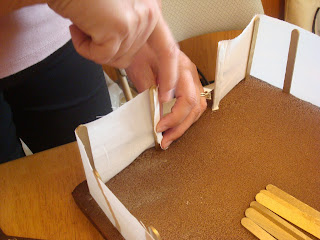
I stretched some white cotton fabric around the tent posts, gluing it to the two posts that formed the entrance to the courtyard.
Most of the children spent an hour or less on their sculpey clay object, with the exception of daughter G who spent much longer on the Ark of the Covenant. Son G made the lampstand.

Little Man made the altar of incense (with some help from me). His big sister showed him how to make a clay rope around a toothpick, the toothpick giving extra stability to the handles.

I baked the sculpey clay objects as directed, at 275 degrees for 15 minutes per 1/4" of thickness, but for some reason this time they actually took much longer to bake. I just kept checking them and leaving them for a little longer. Most items baked for an hour or more. The next day when they were cooled, we painted them. Son C made and painted the laver, or washbasin. The washbasin and the altar of burnt offering were the only objects that were covered in bronze. All the other objects were covered with gold. So son C painted the outside of the washbasin bronze, and the inside blue, for the water.
In addition to the Ark of the Covenant, daughter G made tiny little ten commandment tablets for the inside of the Ark, as well as Aaron's rod and a small jar of manna. Here she is painting the jar. She was in her element for this project!!

Little Man painting the altar of incense.


Daughter G wove the curtains for the entrance to the courtyard, entrance to the Tabernacle, and the curtain separating the Holy Place from the Most Holy Place on cardboard looms she made from an empty cereal box. We found beautiful yarn that had purple, scarlet and gold flecks in it, but we couldn't figure out how to weave in cherubim, so we left that detail out of our model.


I made loops in the edges of the tent fabric out of embroidery floss, and we inserted the popsicle-stick-top-of-the-curtain into these loops. This shows the entrance to the courtyard from the back.

We had to fasten the Most Holy Place curtain a little differently.

An action figure from an Indiana Jones play set served as priest! He is blowing a sculpey clay shofar.

Here is the altar of burnt offering that I made. One trick my daughter taught me is to wad up a ball of foil and put it in the middle if you are making a large boxy shape out of clay. It enables you to use less clay, and it helps the clay to bake faster since it's not solid all the way through.

Son L made the table of the presence. He used pennies for the showbread, a stack of 6 on each end of the table, one for each of the twelves tribes.

Here is a close up of the Ark daughter G made,

with the articles inside.


The finished Tabernacle!
This was an amazing project to do together! I highly recommend it. It was such a blessing to see my children frequently referring to the Bible to be sure they were "making it right." And we talked constantly while we worked, discussing the various rituals and what possible meaning they could have for us today. We learned SO much and had fun doing it! It will definitely be a highlight of our year!
(p.s. we spent about $35 on materials for this project, but many of the materials did not get used up and can be used later for other projects. For instance, we bought a $10 package of sculpey clay, but only used half of it. We have lots of leftover yarn and paint as well. So the actual cost of making the Tabernacle was probably closer to $20. Money well spent!)
To make our Tabernacle model we first went to the craft store and found a bunch of stuff we weren't really shopping for! (and that stayed at the store)
hahaha
But we also found things we needed. We talked about the project and planned it out before going to the store. Since we intended to send it later to my parents, our model had to be easy to take down and put up again. We looked at pictures of other models online to give us ideas, and decided to use a foam base as in my friend Laurie's model. We also assigned one of the holy articles to each child to make out of sculpey clay, so one of the children was tasked with the job of finding the sculpey clay in the store, and another couple of them picked out the paint colors we'd need (small bottles of acrylic paint for painting the holy things).
Here G and G are picking out the felt coverings for the Most Holy Place. We got four different colors to correspond to the four different coverings ~ white for "linen of the finest quality", gray for "goat's hair", red for "ram's skin dyed red", and brown with a swirly pattern for "the hide of sea cows".
This entire project took us about a week, but most of the work was done during just two of those days. The children completely owned this project. I did very little, and in fact, could have probably done nothing!
We found a 12" by 20" piece of foam for the "ground" and spray painted it brown. I'm not sure I'd spray paint foam again, as the paint seemed to melt the foam in a few places, but we figured that made the ground look more realistic. We also spray painted some craft sticks gold, to simulate the acacia tent poles that were overlaid in gold. Spray paint worked fine on those. Once the foam and sticks were dry, we began poking the sticks into the foam, evenly spaced.
I stretched some white cotton fabric around the tent posts, gluing it to the two posts that formed the entrance to the courtyard.
Most of the children spent an hour or less on their sculpey clay object, with the exception of daughter G who spent much longer on the Ark of the Covenant. Son G made the lampstand.
Little Man made the altar of incense (with some help from me). His big sister showed him how to make a clay rope around a toothpick, the toothpick giving extra stability to the handles.
I baked the sculpey clay objects as directed, at 275 degrees for 15 minutes per 1/4" of thickness, but for some reason this time they actually took much longer to bake. I just kept checking them and leaving them for a little longer. Most items baked for an hour or more. The next day when they were cooled, we painted them. Son C made and painted the laver, or washbasin. The washbasin and the altar of burnt offering were the only objects that were covered in bronze. All the other objects were covered with gold. So son C painted the outside of the washbasin bronze, and the inside blue, for the water.
Little Man painting the altar of incense.
Daughter G wove the curtains for the entrance to the courtyard, entrance to the Tabernacle, and the curtain separating the Holy Place from the Most Holy Place on cardboard looms she made from an empty cereal box. We found beautiful yarn that had purple, scarlet and gold flecks in it, but we couldn't figure out how to weave in cherubim, so we left that detail out of our model.
I made loops in the edges of the tent fabric out of embroidery floss, and we inserted the popsicle-stick-top-of-the-curtain into these loops. This shows the entrance to the courtyard from the back.
We had to fasten the Most Holy Place curtain a little differently.
An action figure from an Indiana Jones play set served as priest! He is blowing a sculpey clay shofar.
Here is the altar of burnt offering that I made. One trick my daughter taught me is to wad up a ball of foil and put it in the middle if you are making a large boxy shape out of clay. It enables you to use less clay, and it helps the clay to bake faster since it's not solid all the way through.
Son L made the table of the presence. He used pennies for the showbread, a stack of 6 on each end of the table, one for each of the twelves tribes.
Here is a close up of the Ark daughter G made,
with the articles inside.
The finished Tabernacle!
(p.s. we spent about $35 on materials for this project, but many of the materials did not get used up and can be used later for other projects. For instance, we bought a $10 package of sculpey clay, but only used half of it. We have lots of leftover yarn and paint as well. So the actual cost of making the Tabernacle was probably closer to $20. Money well spent!)
Subscribe to:
Posts (Atom)