I had wanted to give a taste of this style to the children for some time but never found an opportunity to fit it in. It ended up being the perfect way to end our school year! We started out by looking at pictures of Impressionist paintings in this book:

This is an incredible art book I purchased 3 years ago when we were just beginning to use Tapestry of Grace for our core curriculum. We used it extensively when we studied the Renaissance, but had not used it much this year. I flipped through all the pages ahead of time and post-it noted together several pages that had just a little too much art for my children's young eyes, if you know what I mean! While looking at the pictures we talked about what made Impressionist art "impressionist", until I felt sure that the children had a good grasp on what to look for to identify art as Impressionist. (see the post it note folded over several pages?)

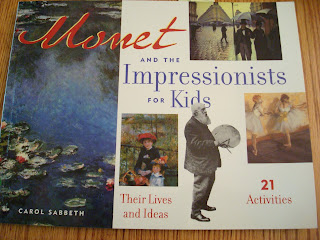
Then we looked at a few more pictures in this book (below) which is a GREAT book for kids! (suggested by our Tapestry curriculum and given to us by a generous book fairy). Just the right mixture of pictures, the history of various Impressionist artists, and projects to do that aren't too complicated. Everything we needed for these two projects were items I already had, so not only was this fun, it was also FREE!

Our first project involved working with light (the sky) and shadow (the ground). It had two main steps.

First, the children each picked a stencil (showing something "real" and not posed). We taped these to paper and they painted inside the stencils with watercolors.


While these paintings dried, we began working on the background papers. We drew clouds with white chalk and then filled these in with dashes of colored crayons. Then we painted the background and the crayon "resisted" the paint.


When the backgrounds and the stenciled pictures both dried, we cut out the stencil shapes, glued them to our backgrounds and added shadows under our stenciled figures. They turned out great! (see below)
Our second project was a 3-D painted paper water lily.

It was based on this painting of water lilies by Monet. We talked about the different colors in the water lilies, and about the light and shadows on the surface of the water.
 Then we cut 3 small flowers (yellow) and 3 large flowers (pink) for each child, and painted them with tempera paints. All of the children had fun mixing and creating their own color shades.


After they were all dried, we glued them to green lily pads. Don't they look beautiful?!

Here is the first project, all finished.
 (this one was Little Man's and he really wanted to add a "j" to his sky!)


And here is each child with his or her art work so you know which work goes with which artist.


It was a very fun day!
I have a more serious post coming soon, but sometimes it's emotionally easier to write about light topics right now (not to mention getting all these pics out of my camera!).


6 comments:
That was wonderful. What talented artists you have and what a great mom they have. Since I always have to ask a question: where did you get the stencils?
Lovely! What a nice way to end your year. I'm sure that your children loved it.
We have the painting book also, and I'm very impressed by the condition of yours...ours is falling apart.
I suspected a serious post coming; I have been praying for you.
It has been a while since I have visited. The art projects look fantastic and are inspiring to me. We'll be studying Y2 next year. I'm looking forward to it! Thanks for sharing your joy.
both art projects look really fun. i'm so glad you had such a fun and creative last day.
These are great! We are behind but we'll catch up!
Blessings,
Laurie
Beth in Texas: I have had the stencils for years, so I'm not positive, but I think I got them from discount school supply. I placed a couple large orders from them several years ago for school/art/preschool type things, and I have been so thankful many times for the items we purchased from them! I don't see people stencils on their website right now, but here's a link to all the stencils they do have:
http://www.discountschoolsupply.com/Product/ProductList.aspx?category=-1&keyword=stencils&page=1&Sort=0&&CategorySearch=-1&at=5
Post a Comment